This blog is to give ideas how to build R package through Rcpp and C++. Here we assume our readers are confident of C++, Linux and R.
This semester we have been trained to use C++ and Rcpp to write the R package. It is well known that the computing speed of R is slower than C++. Rcpp is an R Package that combines C++ and R. With Rcpp, it could easily transfer the algorithm or functions between R and C++, providing high-performance statistical computing to most R users. It is useful when statisticians want to develop their own R package. So, I will write it in 3 steps and using an Example.
Step 1: Write your own algorithm in C++
Firstly, you have to write your own algorithm in C++ in a Linux system. And next, we have to add some code in C++ to make sure it could be translated by R:
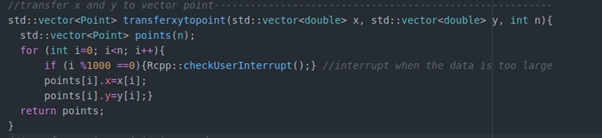
- Add #include<Rcpp.h> at the beginning
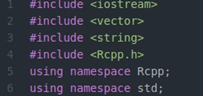
- Add //[[Rcpp::export]] in your main function

- Add user interrupt through Rcpp::checkUserInterrupt(). It allows users to terminal algorithm when it runs too long.
Step 2: Build package
After obtaining our ‘cpp’ algorithm, we have to package it as a ‘zip’ file so it could be easily downloaded by anyone who wants to implement it in R. To do so, we have two simple steps:
1. Building Skeleton Folder
Skeleton folder just like the skeleton, containing all the main programs here. It is very simple to create: in R, run the code:
package.skeleton(“The name of package”, cpp_files=”path to your c++ file”, example_code=FALSE) In my example, I created a package called ‘finaljarvismarch’, and write the path to my cpp file in ‘cpp_files’. If example_code=TRUE, the package will contain an example code.
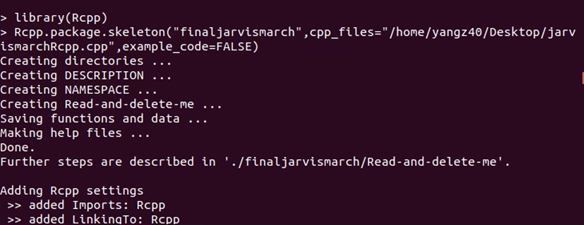
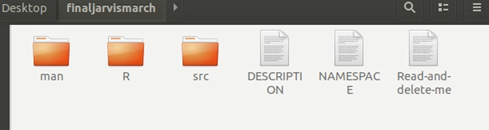
This creates the package skeleton in the working directory. It contains three files and three folders:
- Man: It contains the Rd file, which is the description shows in R.
- R: It contains all “.R” files written by R.
- Src: It contains all “.cpp” files written by C++.
We could manually put our further R function or C++ function in different folders.
2. Building Package
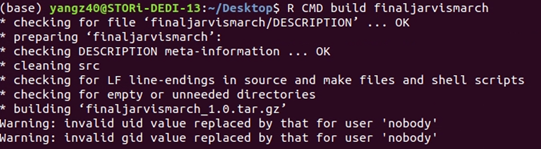
Once we got the skeleton folder, run the command in terminal to create the package:
R CMD build PackageDirectory/PackageSkeletonName This builds the package tarball, which can then be sent to and installed on any machine running R.
Step 3: Checking instalment
Until now, we have successfully create a package. However, we have to test if it could be install appropriately.
Run the command in the terminal in the directory:
R CMD INSTALL PackageTarBallName
Luckily without any error! Now, our package could be downloaded as a tarball by any user, and successfully install in R. To use package, directly run: library(‘PackageTarBallName’)
Example: Jarvis March algorithm
We are asked to build a Jarvis March package, you could download the tar file here. After download it, it could be installed easily
- Run the command in the terminal: R CMD INSTALL finaljarvismarch
- Run the code in R: library(finaljarvismarch)
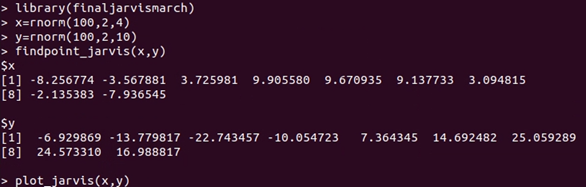
Now you could use Jarvis march algorithm for 2 dimension data. In this package, it contains two functions:
- findpoint_jarvis(x,y): inputting the x and y, it outputs the points in the convex hull.
- plot_jarvis(x,y): inputting x and y, it returns a plot containing all the data points and convex hull.
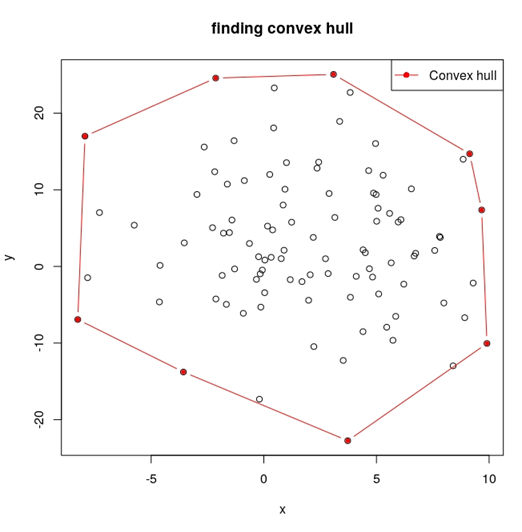
For example, simulating 100 points, and run the functions:
x and y is the corresponded coordinates of points on the convex hull, and we could also draw the plot:
Thanks a lot for great job. I tried for long times with rstudio, without any successes.